Comment installer un joint à lèvre
Here are some basic steps for installing a lip seal. These steps will vary depending on the type of seal and the pump technology it’s going into, but for this example these steps relate to installing a lip seal into Viking Pump’s G and GG sized 75 Series™ pumps.
Note: Before any work begins on a pump, please consult the appropriate technical service manual for safety information. A copy of the latest revision can be found on our website.
What you need for installation
To install the two lip seals into a G or GG sized 75 Series™ pump, you’ll need two pieces of equipment:
- Arbor Press
- 2 ¾” press fixture
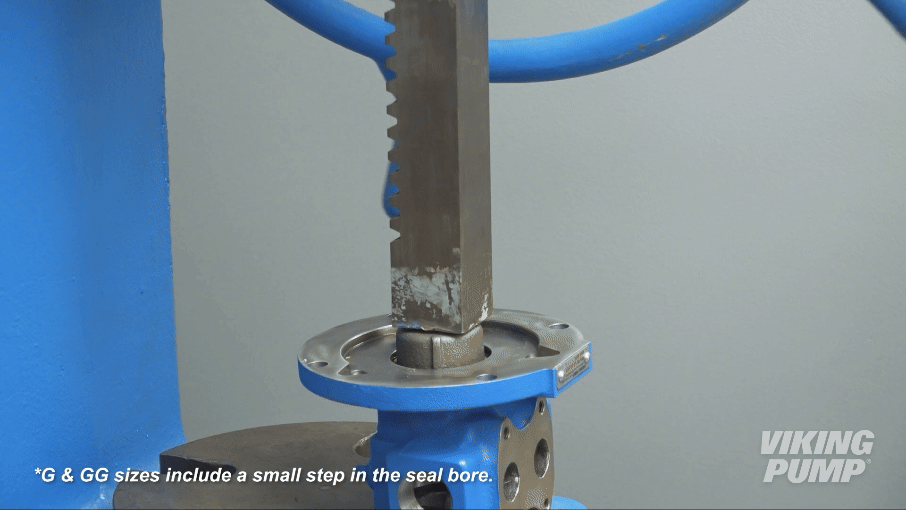
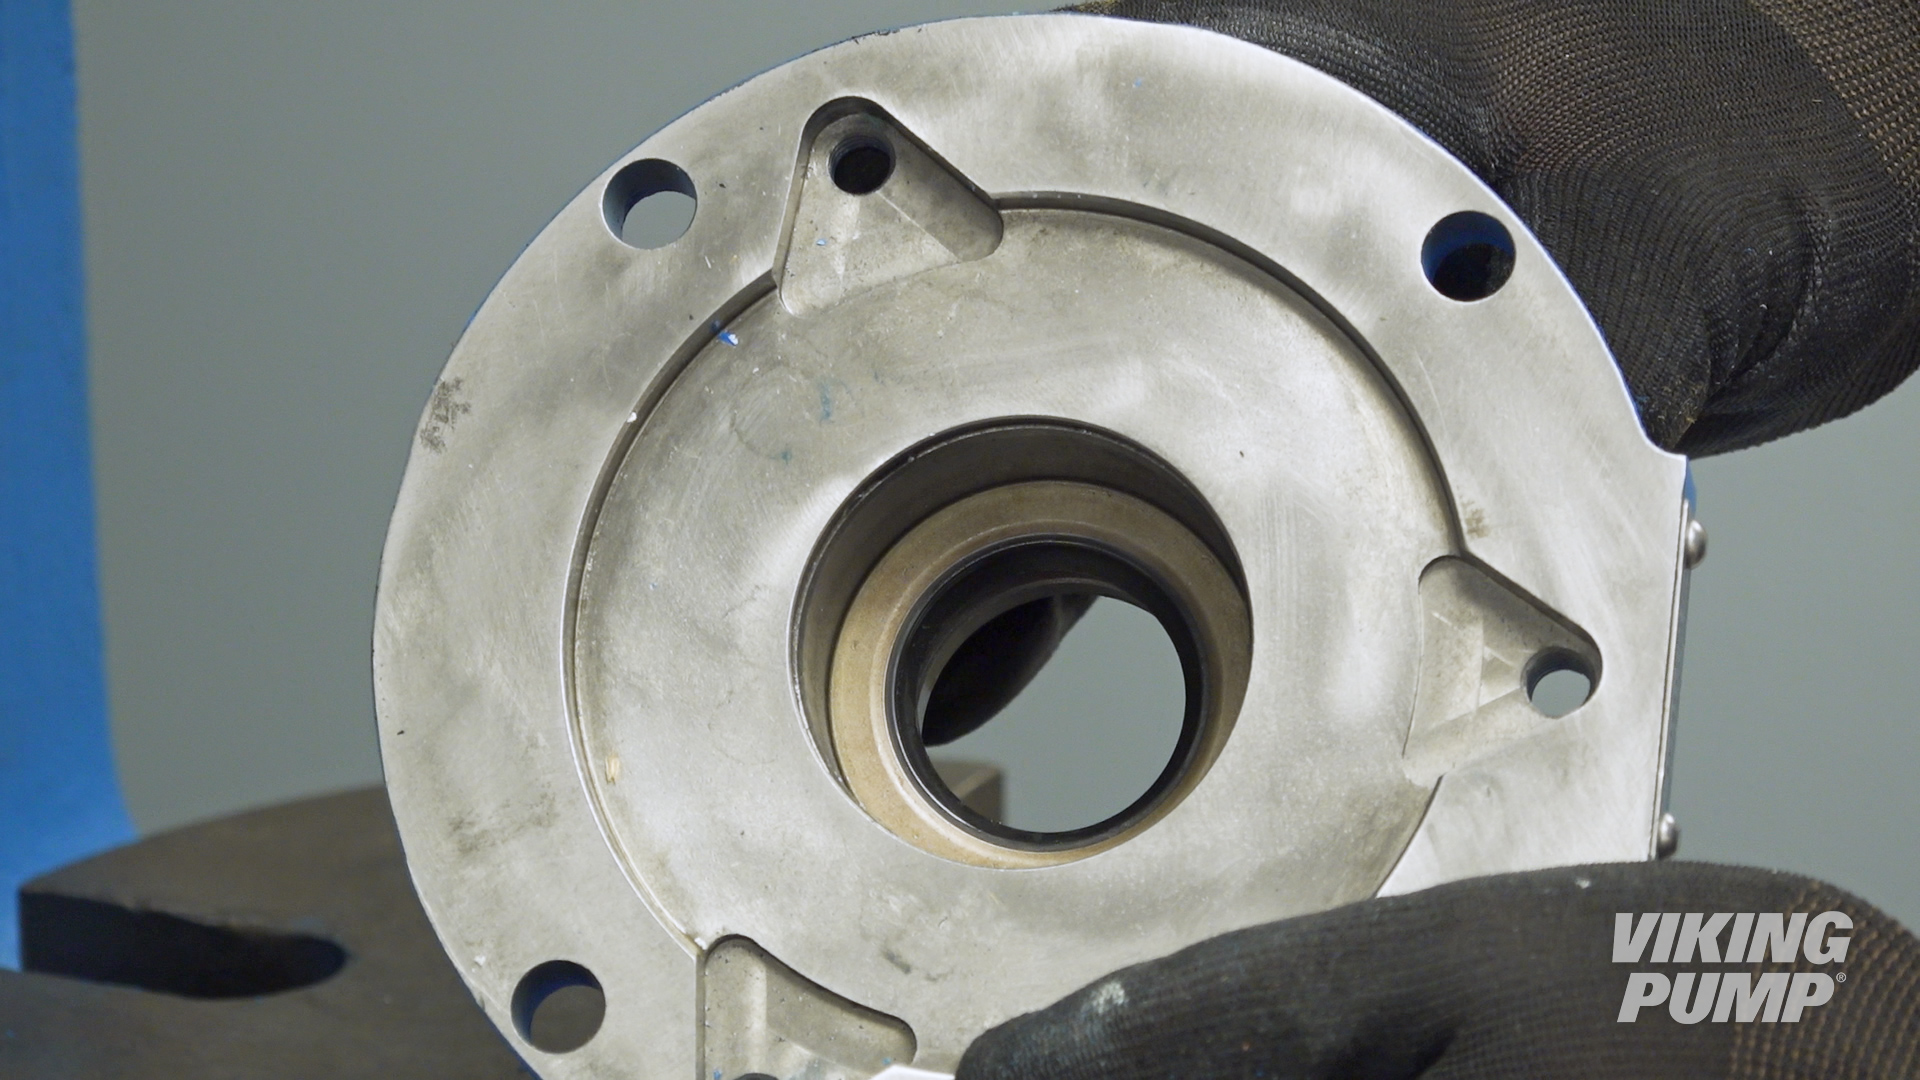
Pressing in the sealsThe 75 Series™ has two lip seals that are pressed in one at a time. The lips face outward from each other when installed. For G and GG sized pumps, the lip seals will be pressed in from the flange side of the pump. |
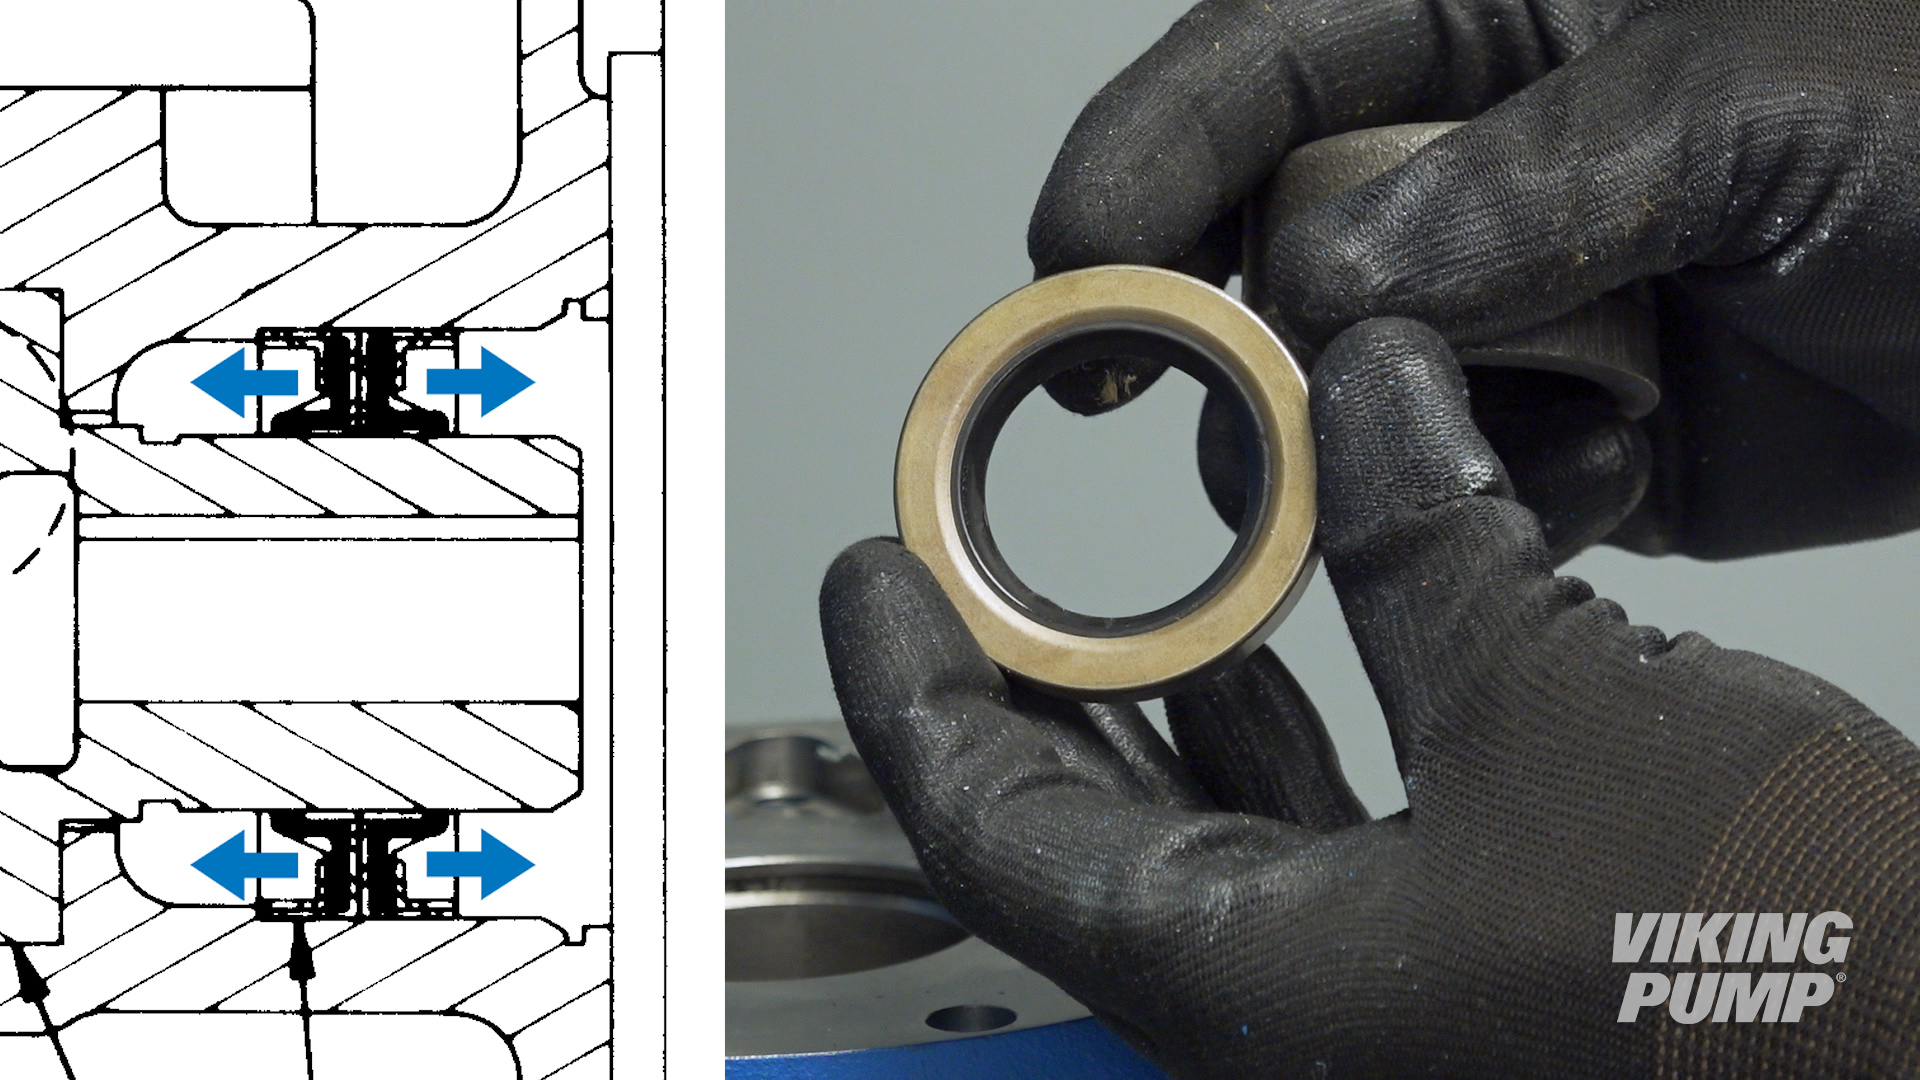 |
| Place the first lip seal into the bore with the lip down. | 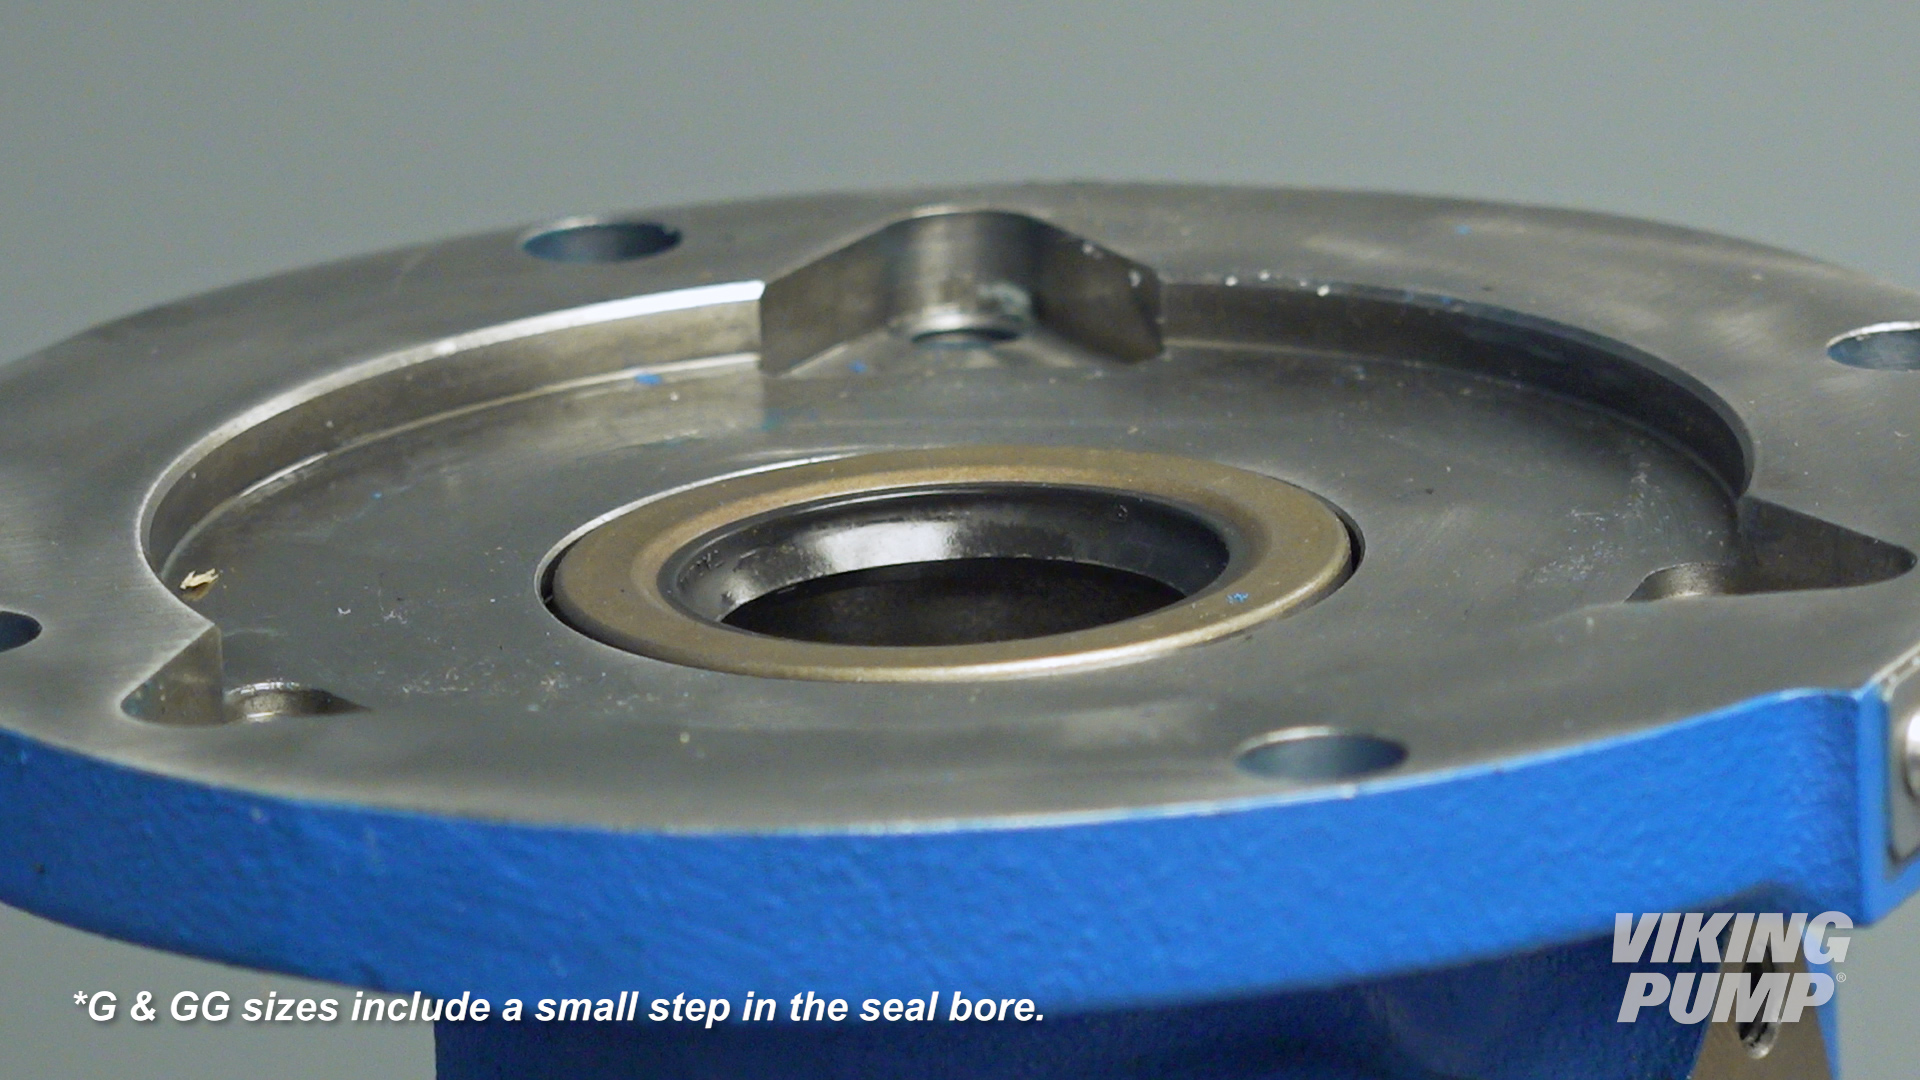 |
| Press until it stops at the bottom of the seal bore. |
|
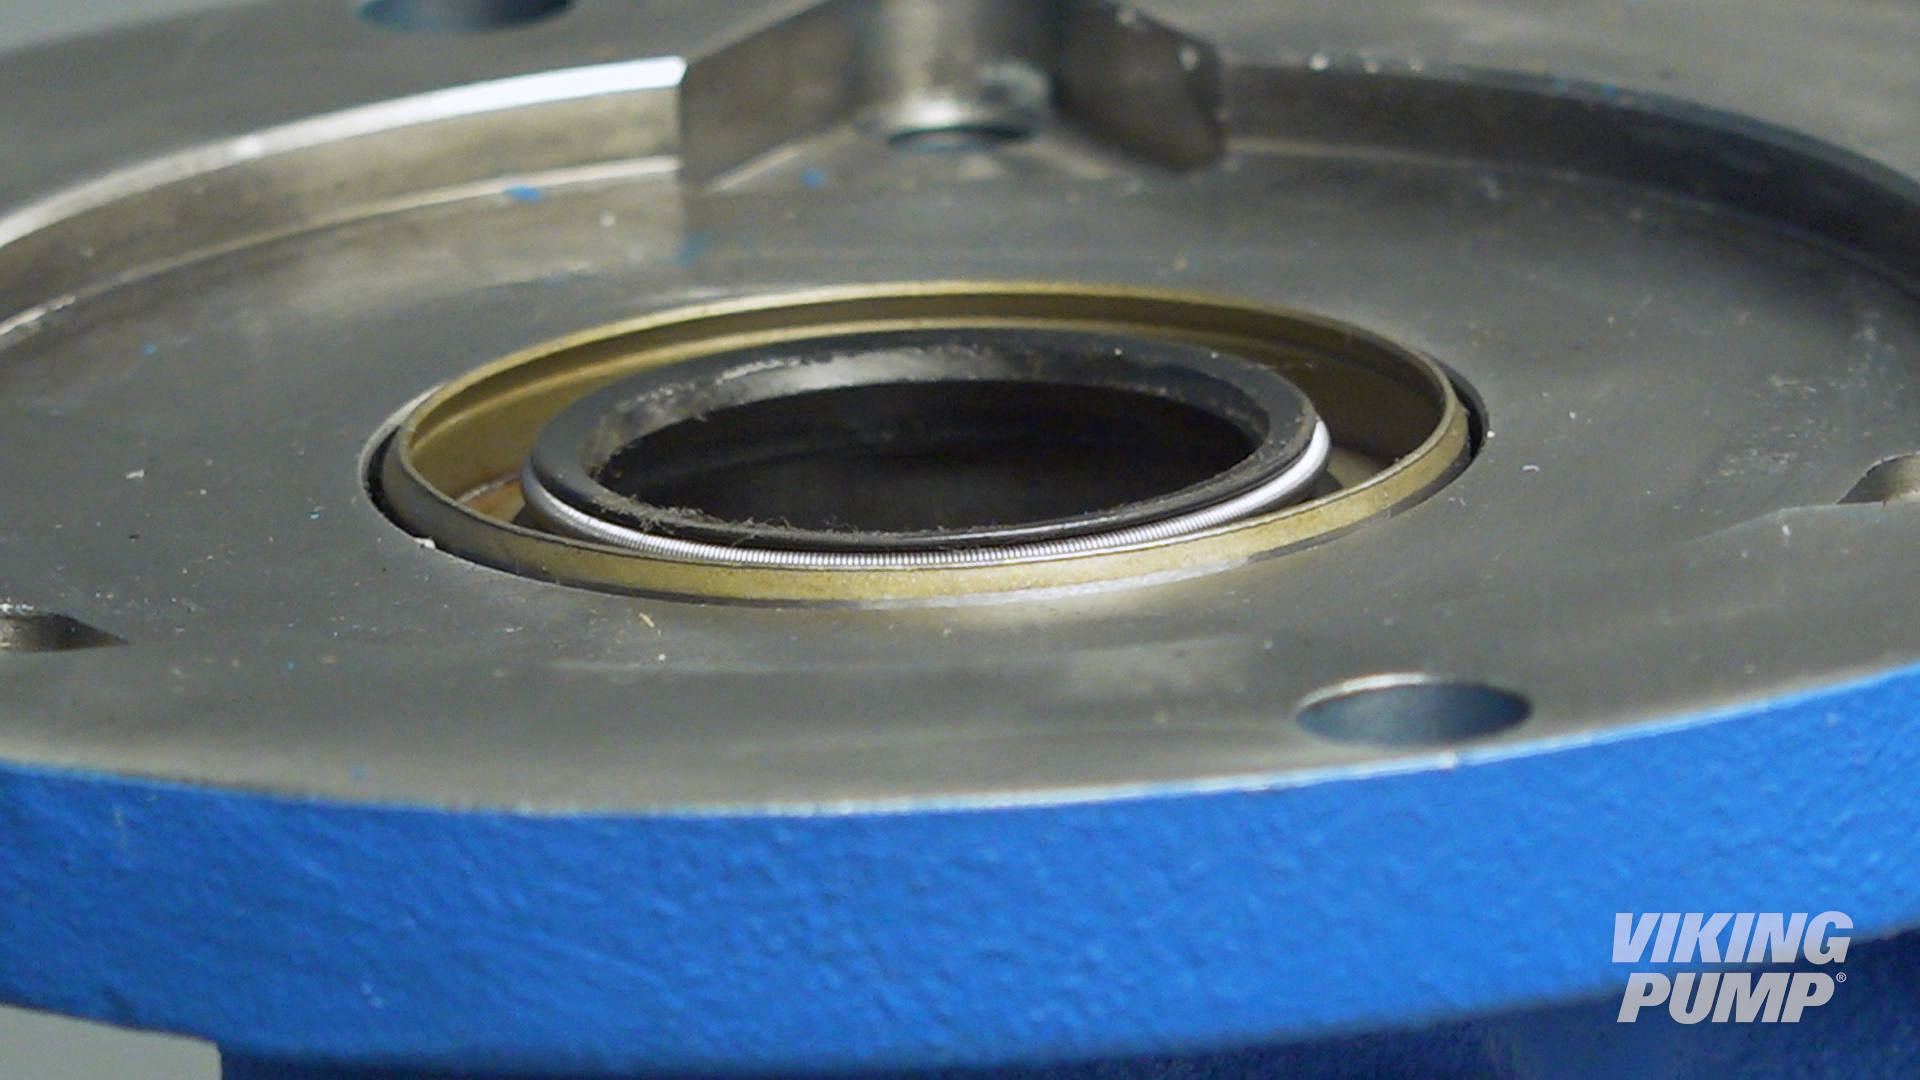
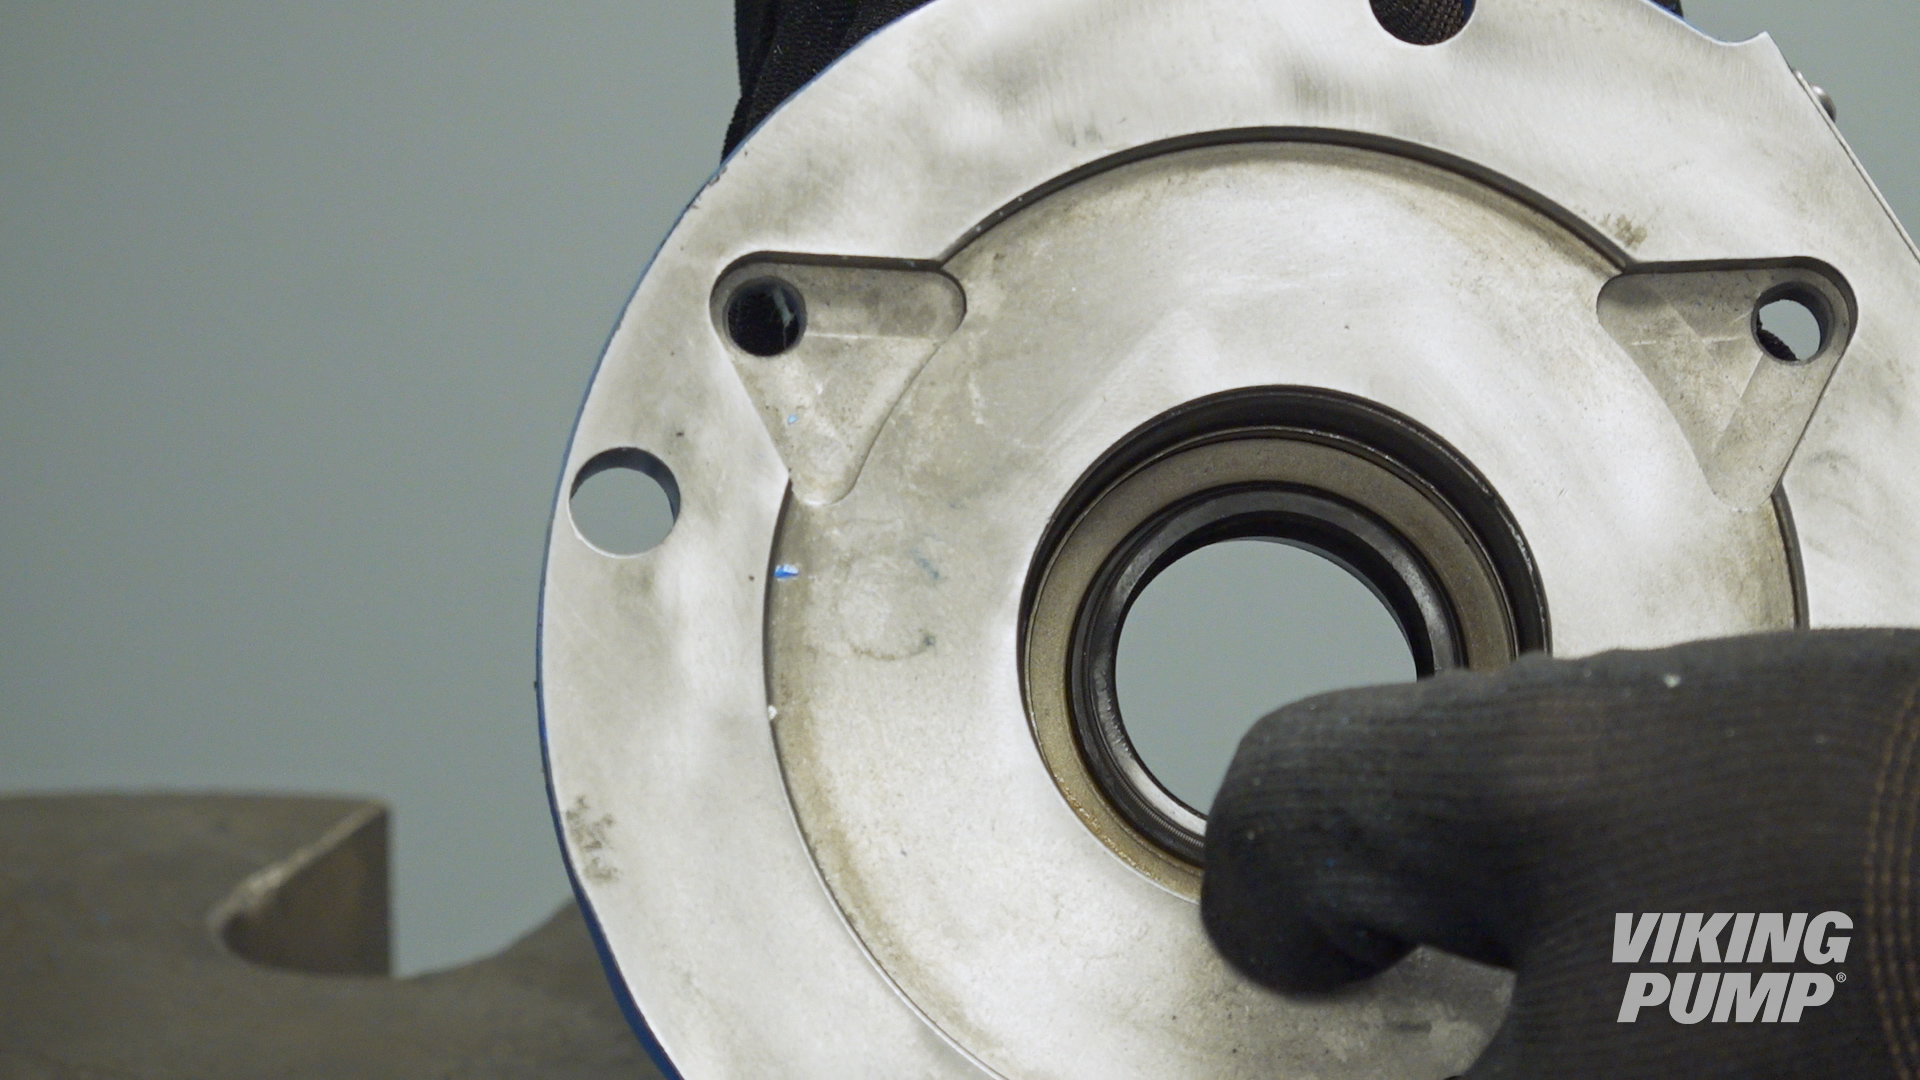
| Place the second lip seal with the lip facing up and press until it stops against the first lip seal. |
|
| Pack the area between the lips with compatible grease. | 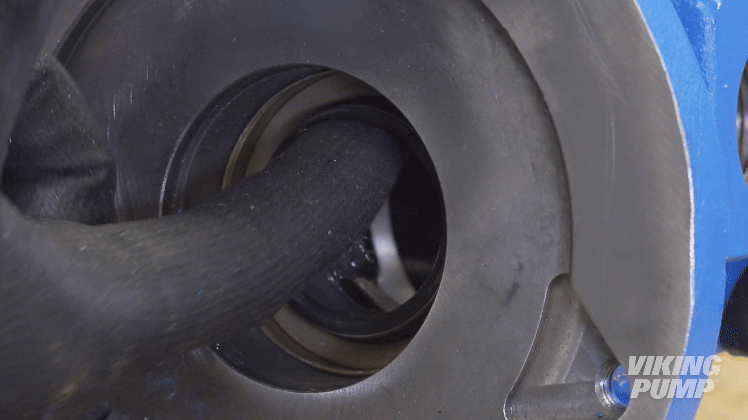 |
| You can now complete the rest of the pump assembly. | |